To generate the APKs
If you don’t have already installed the APK Generator please click here to see how to install it at the bottom of the article). Note that if you don’t have a dedicated server you can’t install the APKs generator, and when you will download the Android Version you will get the source files to compile them manually.
If you have the APK Generator installed, you can generate the APK files automatically from your backoffice by going in Manage > Applications, then enter in the app sheet, go down in the page and you will find the link “Generate APK”. Click on it and then refresh the page after a few minutes and your APK will be available to be downloaded.
If you don’t have installed the APK Generator, to manually generate the APK, follow these steps to generate it from the source files:
First of all you need Android Studio to generate the APK. If you haven’t already you will have to download and install it.
Go to http://tools.android.com/download/studio/canary/0-8-14 and then download the Android Studio v0.8.14 related to your OS, and install it.
Then, go here https://developer.android.com/sdk/index.html and at the bottom of the page, in the “SDK Tools only” section download and install the SDK related to your OS.
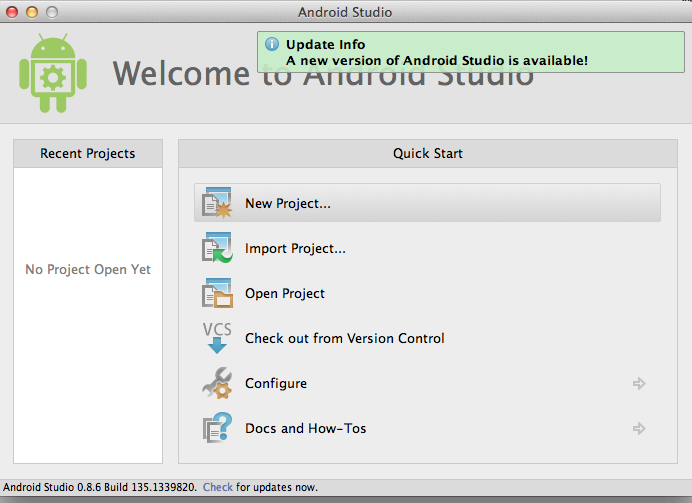
Then, open Android Studio you’ve just installed, and click on “Configure”:
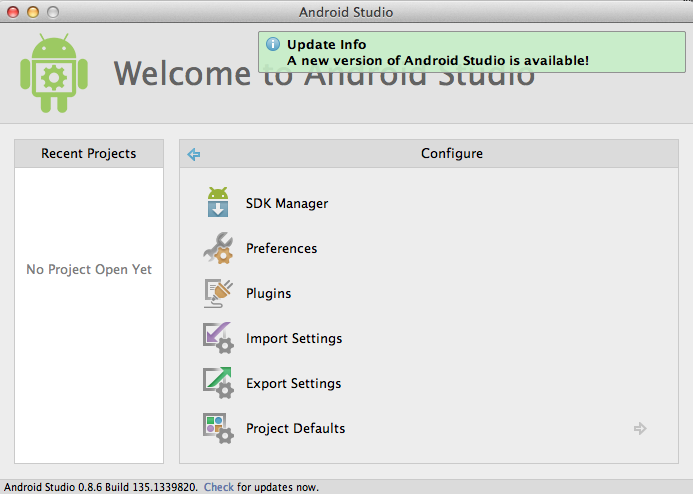
Then, click on SDK Manager:
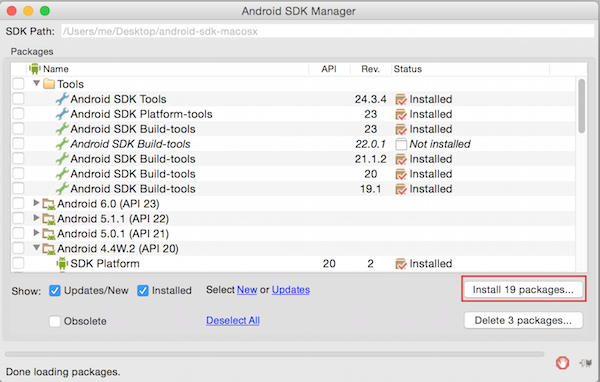
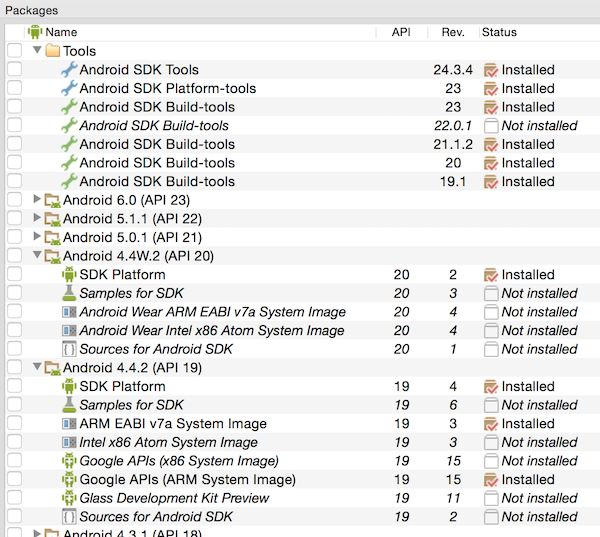
You will see a list of packages, some are installed some are not. There are some items that are checkked and some that are not. In addition to the ones that are already checked, be sure these ones are too, if not, check them:
- In Tools:
- Android SDK Build-Tools 19.1
- Android SDK Build-Tools 20
- Android SDK Build-Tools 21.1.2
- In Android 4.4W.2 (API 20):
- SDK Platform
- In Android 4.4.2 (API 19):
- SDK Platform
- ARM EABI V7a System Image
- Google APIs (ARM System Image)
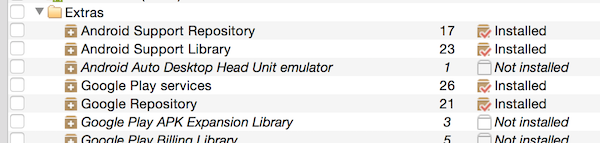
- In Extra:
- Android Support Repository
- Android Support Library
- Google Play services
- Google Play Repository
Then click on the “install X packages” button:
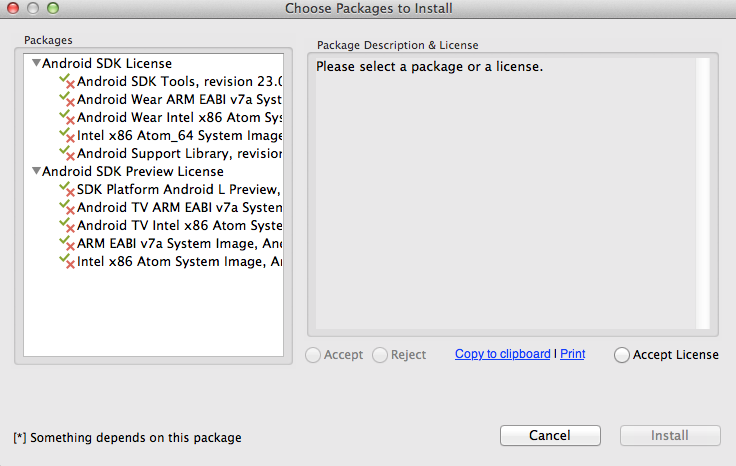
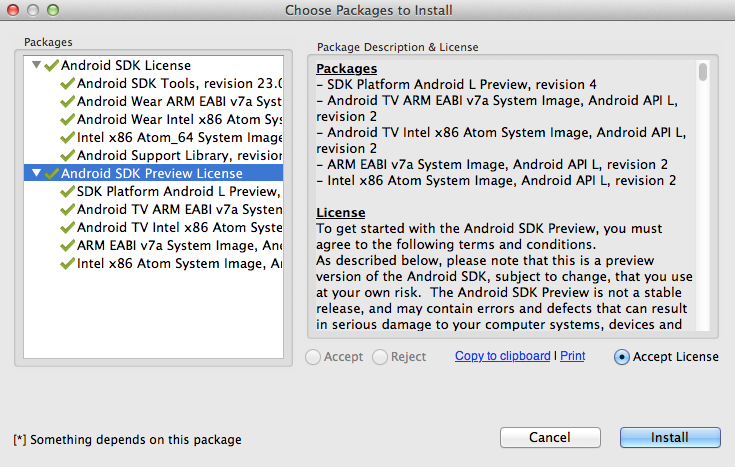
Then, click on every license and choose “Accept License”, and then Install:
Once all the packages installed, you should have something like that:
Voila, your Android Studio is ready to create the APKs.
Okay now, let’s see how to create these APKs.
Note: don’t forget that you have to filled out the Android Push keys for your backoffice prior to create your APK if you want to be able to send push notifications. Here is our article about Android push notifications.
First unzip the folder with the Android sources which is named android_source.zip.
Go back to the main menu of Android Studio:
Click on “Import Project”. You will see a warning message, don’t worry about that it is the normal process, click on Ok.
Then choose the Android Source folder you have unzipped, and click on “import”. When your project is imported, from the left menu, click on your folder “android_source” and open the tree. Check if there is no warning on folder and files.
Then from the main menu click on Build > Clean Project.
Then Build > Generate Signed APK.
Then, click next and you get this screen:

Depending if it’s an update of an app already published, or a new app you want to publish choose:
– “Create new”, if it’s a new app
– “Choose exiting”, if it’s an update of an app already published
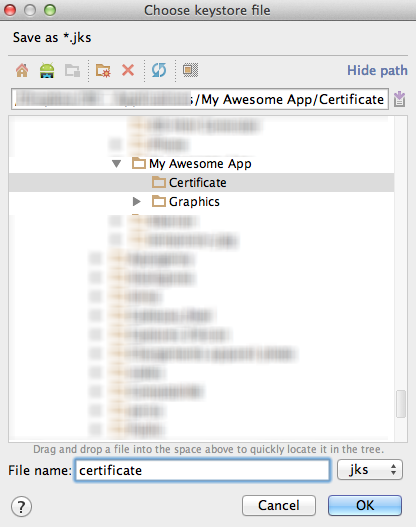
In this tuto, we will choose the first case, but second case is almost the same. Okay, so you have chosen “Create new”. Now we suppose that you are someone very organized (if not already, take a look to the article about iOS publication and organize your folders the same way), and thus that you have already create a folder for your app publication on your computer. Before having downloaded the android sources, you have created a folder on your computer named “My Awesome App”, for instance, with two subfolders: one for the graphic items, like screenshots of this app, and one for the certificates which will be named “certificate”. Thus, on your computer we have a folder named “My Awesome App” with the subfolder “certificate” and the other subfolder “graphics”.
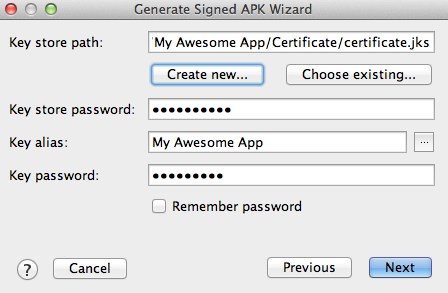
Okay now let’s go back to Android Studio. You have clicked on “Create new”, and you get this screen:
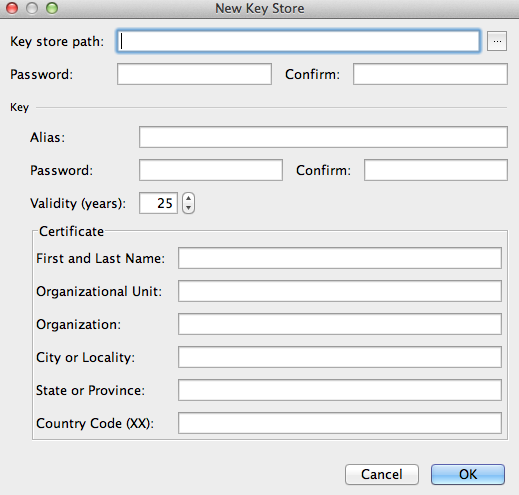
Now click on the button to browse in your computer folder and go to the “certificate” folder, in the main folder “My Awesome App”, and below in the “File name” field, enter “certificate”, and click ok:
Enter a password for the key:
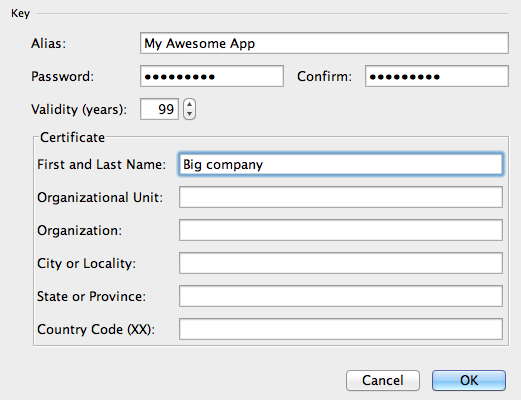
Set the Validity to 99 years, and enter the name of the app owner. Then click Ok. In the summary screen click next :
Then in the next screen, choose “release” for “Build Type” and then click on Finish. Your APK is built.
NOTE:
You can have some problems generating the APK for apps with name in other alphabets than the latin alphabet, like arabic alphabet, cyrillic alphabet or others, or problems with app name beginning with numbers.
In these cases, you should do the following:
Change the app name in your edition
Download the sources
Rename your app in your edition with the name in your language
Open the project in Android Studio and on the left open the folder app>src>main>res
In each “values” folder, double click on the file name “strings.xml”, in it you will be able to change the app name by the one in your own language. Then save the strings.xml file. Once you have done that in each “value” folder for each language, you can begin the creation of your APK.
To fill out the app sheet on Google Play
Store Listing
In the Store Listing page, fill out the two descriptions with the description that are in the App details page in the backend of your Commercial Edition. In the Graphic Asset section, the mandatory elements are a 512×512 icon (you find it in the App details page in the backend of your Commercial Edition), at least 2 screenshots whatever if it is for tablets or phones (you can use the ones you have generated for the iPhone version (use ones created for iPhone 5 or iPads), and a 1024x500px image that will illustrate the app.
Then, in the Categorization section, choose “Application” for Application Type. Then select the appropriate category for this app (you will find the one selected by your client in the app details page in your backend), and then sleect a content rating for this app.
Service & APIs
Click on the “Link a Sender ID” button, and paste the key that is in the backend of your Commercial Edition in Settings > Push Notifications > GCM Key, then click on “Link”.
APK
Click on “Upload your first APK to production” and upload the APK that has been created.
Go in Pricing & Distribution
Select if it’s a paid or free app. It can be a paid only if the developer account has enabled Google Merchant Services. Then select all the countries or just specific one(s). Then scroll down and check “Content guidelines” and “US export laws”. And Save.
Publish
In the upper right corner click on “Draft” and select “Publish”.
Voila! Your app is published.
Did You Find This Article Helpful?
No - 2 visitors found this post was not helpful

2 Comments
Fairy Memon
HI, how to publish on IOS Apple, ITune.
Regards,
Fairy
Nate Roberts
The links on this page http://tools.android.com/download/studio/canary/0-8-14 are broken