Server configuration
Take a look on this article to know exactly what you need in term of server configuration: Server requirements
Elements needed
Here is what you need before to proceed to the install:
- an FTP software, you can dowload and install Filezilla for instance
- FTP access
- SSH root access. If you want to get the APK generator to be installed on your server you need SSH root access. These access may have been sent to us when you have bought your server. If not, ask your provider to provide you the SSH root access.
- A MySQL Database. Create it from your hosting admin panel.
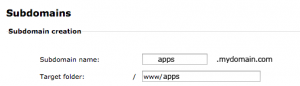
- A subdomain and its associated folder on your server. The Commercial Edition can be installed on a subdomain only, and not in a subdirectory (apps.mydomain.com Vs mydomain.com/apps). Create this subdomain and the associated folder from your hosting panel.
The installation, step by step
Installation of the Commercial edition
You can check this video on how to install it from your hosting admin panel (The video is about a Platform Edition, but the process is the same), or go below to see how to install it, step by step.
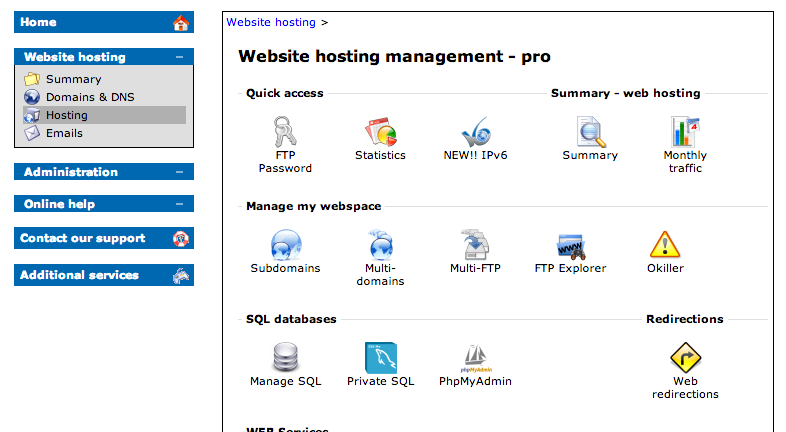
- Connect to your hosting admin panel
- Then, create a MySql database. Don’t worry, it’s just about clicking on a button and creating credentials. It depends on your hosting provider but you may always have the option to create a database, and most of the time it will be a MySQL database. Just find on your interface where to create a MySQL database, and just create it. Save on a text editor, like Notepad, your database name, the database username, the database password and the server name (given by the provider). Here is an exemple on the OVH admin panel, it may look like very different on other admin panels, but the most important for you is to understand the global process:Click on “Manage SQL”:
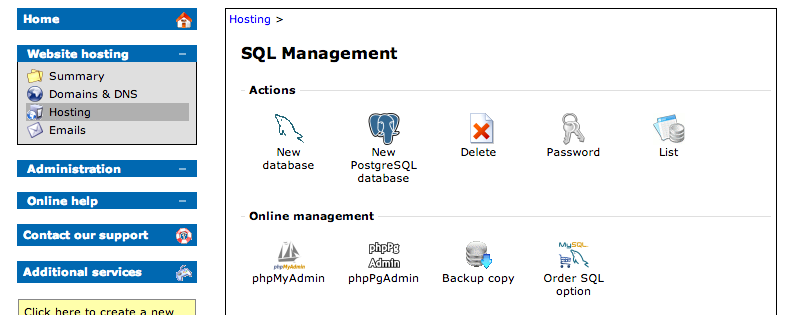
 Click on “New database”:
 Create your database:
 Actually, Ovh creates itself the database username, the associated password, and sends them by email.
 - Create your subdomain. It must be a subdomain, not a CNAME record. Find in your panel where to create a subdomain, and create it. For instance it could be “apps.mydomain.com”. That’s the address on which your Siberian Edition will be installed and where your clients will go to create/manage their apps. Indicate on which folder on your server, this subdomain refers to. Depending on the provider, this folder must, or must not be created prior of creating the subdomain. Most of the time, you just have to indicate the name of the folder and the system will create it if it doesn’t exist. In all cases you will be able to see if it has been created or not, and if not, to create it yourself. We will see that below in the FTP section.
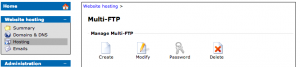
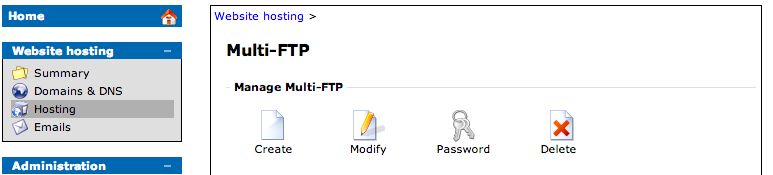
- Most of the time, when you buy a hosting, some elements like ftp access are automatically created for you and sent by your provider on your email address. If you see in your inbox that your provider has sent an email with some ftp credentials, just go on the next step. If not, you will have to create an ftp access. Find where on your hosting panel and create an access to the root of your server. Here is an exemple on the OVH admin panel, it may look like very different on other admin panels, but, once again, the most important for you is to understand the global process:
Here, I click on “Multi-FTP”:
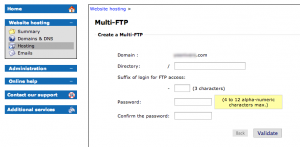
 Then, on create:
 Then, I fill out. Dont bother with the “Directory” field, let it like it is, or enter the path to your subdomain folder (if you let it like it by default you will connect to the root of your server, if you enter the path to your subdomain folder you will have access to only this folder. If you don’t what is the path to the folder, let it like it is):
 Your hosting provider should send you an email as soon as your ftp access has been created with all the info.
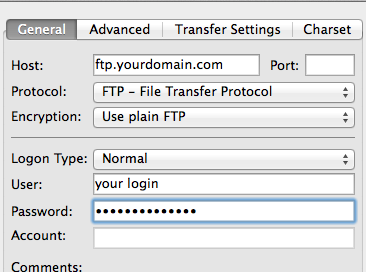
 - Open Filezilla that you have already installed on your computer, and create a new entry by clicking on this icon
 In the “Site manager” window, click on “new site” and give it the name you want, like “My Hosting”. Then fill out with the info of your ftp access, and click “connect”:

- Filezilla is going to connect to your server. You will that it is splited in 4 windows. The one on the top left displays the directories that are on your computer, the one on the top right displays the directories that are on your server. The windows at the bottom displays the files that are on your computer and on the selected directory (on the left), and the files that are on your server and on the selected directory (on the right).
- Unzip the package of the Siberian Commercial Edition. There is only one file, it is correct, all files will be downloaded from our servers when you will start the installation.
- Go on Filezilla, if you are not already connected, connect to your server by opening the “Site Manager” and by clicking on “Connect”
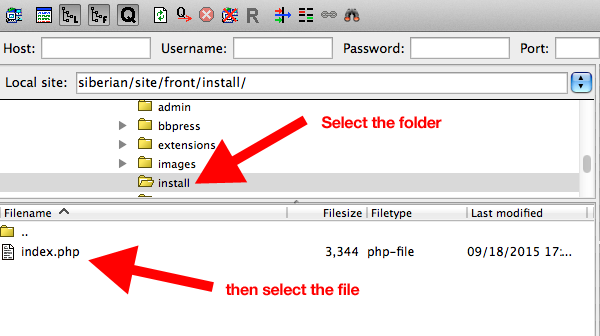
- On the top left window, search for the unzipped Siberian folder that has just been created on your computer when you have unzipped the package, select it, and in the window above select the file:

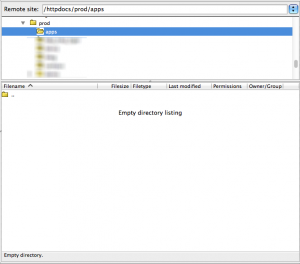
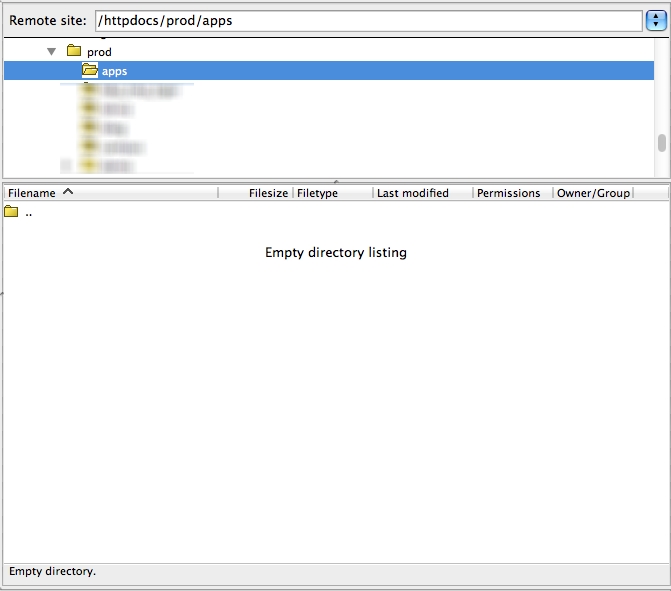
- Now, in the top right window (server side), do this. Go to your subdomain folder. If it hasn’t been already created, create it. You have to create it at the same location that you have filled out when creating the subdomain. For instance, if the location (path) was www/apps, you have to enter in the www folder and then create the apps folder in it from the bottom right window. Then select your folder from the top right window, and the bottom right window should be empty (if not, delete the files and folders that are in it):
- Then drag & drop the selected file from the left, to your folder on the right.
- Then open your browser and launch your domain or subdomain
- It’s going to take a little time since all the files are completely transferred from our servers to yours, do not refresh the page until you see the Siberian install page.
- Once you see the Siberian install page, proceed to install your Siberian.
- Just follow the steps and fill out with the info you already have (like the database info) and choose a login and password to connect to your Siberian backend.
- Once the installation is done, there are two ways to connect to your Siberian Edition:
- Connect to your back-end at subdomain.mydomain.com/backoffice (to keep our previous example: apps.mydomain.com/backoffice)
- Connect to the app editor that your clients will use at subdomain.mydomain.com (to keep our previous example: apps.mydomain.com)


NOTE: here is a list of solutions if you encounter some problems during the installation:
- If Siberian tells you the cURL extension is missing when trying to install:
- First of all, be sure your server meets the Siberian requirements (Server requirements) and be sure cURL is installed and available on your server.
- This error is due to a DNS propagation instability. The only solution is to wait until the DNS propagation of your domain name is complete (this may take few hours). You can check the DNS propagation of your domain name from this website (do multiple checks, until the red crosses disappear): https://www.whatsmydns.net/
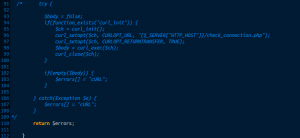
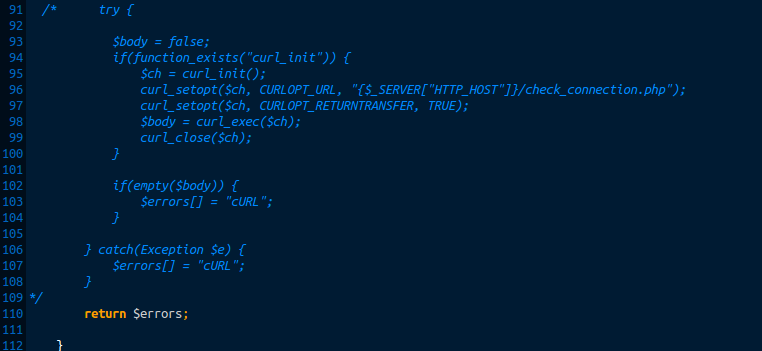
- You can comment the curl check : go in app/sae/modules/Installer/Model/ and open this file Installer.php. Then comment the lines following this screenshot :
- If you get a page “Internal server error” when trying to install:
- Set the permissions to 750 on the Siberian install folder (The permissions must be applied on this folder. Do not recursively change the permissions!), and set the permissions to 644 on the .htaccess and htaccess.txt files of your Siberian install folder. Then, try again.
- You have to edit your .htaccess file if it has already been created, and htaccess.txt file. Comment the lines “Options +FollowSymLinks” and “Options -Indexes” in these htaccess files. To comment a line, just add a # before the line, like this “# Options +FollowSymLinks”. Refresh the page to install your Siberian
- During the connection to the database, if you get a message “error”, that means the mod_rewrite isn’t enabled on your server and/or Apache can’t read the htaccess file. See with your hosting provider to enable this and retry to install. It will be ok only once when you enter your-install-url.com/whatever you are redirected to your-install-url.com
- During the connection to the database, if you get a message “The database connection failed. Please check the entered information.”. That means you have entered wrong info for your database. Most of the time your database server is hosted on the same server than the one on which you install Siberian. Just enter “localhost” in the field “host”. But you can also have a specific database server name, like serv.mysql30-pro for example, in this case, and if it doesn’t work with “localhost”, just enter the name of your server. If you still have this error message, that means your database info are not correct.
- In all cases, here are the best permissions to set on the folders: var/tmp, var/cache, app/configs, and /images folder should be set in 777 permissions, all others should be set in 775 permissions (as well as subfolders)
Installation of the APK Generator
After having installed your Commercial Edition, you can install the APK Generator. This section is for owners of a dedicated server or a VPS only. Shared server owners will not be able to install the APK Generator since they don’t have access to server configuration.
SSH connection
The install has to be done through a SSH connection and SSH root access. If you don’t know if you have the SSH root access aks your provider to create ones for you. These access must be root, and not user access, without a root access it will not be possible to proceed the install.
To connect in SSH, you have to download and install an SSH client. For windows users, you can get Putty, or mRemoteNG. For Mac users you can use the Terminal application that is already installed on your Mac (on your computer, Applications > Utilities > Terminal).
Open the SSH client, and connect with your root access. If you use a window client like Putty or mRemoteNG, just fill out with your info and choose SSH2, then connect to your server. If you are on Mac, open the Terminal, and type this command: “ssh username@domain”, replace “username” by the root username and “domain” by the main domain of your hosting. You can also replace “domain” by the server IP, in this case it would be “ssh username@234.123.43.98” for example.
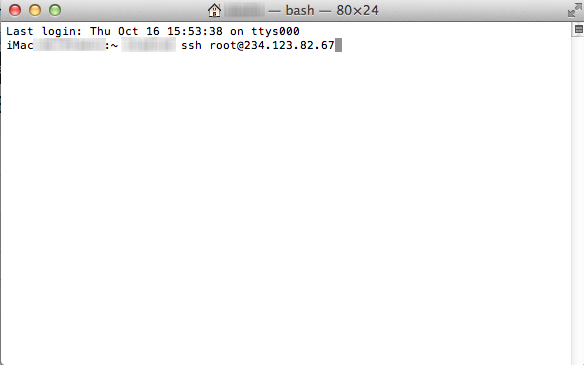
(This is an example, don’t try to connect with root@234.123.82.67)
Then it will ask for your password, just enter the root password and enter. It’s ok you are connected in SSH to your server with root access.
For GoDaddy clients, in their process they tell to connect first with your admin access, and then to authorize these access to connect as root with the “su -” command (see their article). But this command doesn’t work and it’s not possible to get root access from your admin access. Tell GoDaddy that this “su -” command doesn’t work (“Command not found”), and ask them to create these root access for you or to enable this “su -” command.
In all cases, if you haven’t SSH root access, ask your provider to provide ones.
Java install on your server
First Java must be installed on your server. To do so, when connected as root, enter this command in your SSH client:
- If your Linux distribution is Ubuntu or Debian:
apt-get install default-jdk
- If your Linux distribution is Fedora or CentOS:
yum install java-1.8.0-openjdk-devel
This command will download, extract and install the Java jdk on your server. (You have to wait a few minutes that the process ends)
Note: If none of these commands works, that means you may have another distribution of Linux, and that you have to install Java manually. To do so, here is the manual install process:
wget --header "Cookie: oraclelicense=accept-securebackup-cookie" http://download.oracle.com/otn-pub/java/jdk/8u25-b17/jdk-8u25-linux-x64.tar.gz
mkdir /opt/jdk
tar -zxf jdk-8u25-linux-x64.tar.gz -C /opt/jdk
update-alternatives --install /usr/bin/java java /opt/jdk/jdk1.8.0_25/bin/java 100
update-alternatives --install /usr/bin/javac javac /opt/jdk/jdk1.8.0_25/bin/javac 100
update-alternatives --install /usr/bin/java java /opt/jdk/jdk1.8.0_25/bin/java 100 --slave /usr/bin/keytool keytool /opt/jdk/jdk1.8.0_25/bin/keytool
Android SDK Install
Did You Find This Article Helpful?
No - 52 visitors found this post was not helpful

4 Comments
maquiaba thierry
Very good
Paukc
i received the email ..but say : An error occurred when generating the apk why ?
Crystal Hale
need help java is install correctly however there is still aproblem generating apk
electronica oriente
I received an email that said that there was an error in generating the apk and the apk was not generated, how do I do it?