In this article, How to manually backup your Siberian, we showed you how to make a manual backup of your Siberian from Plesk and cPanel.
Now, we are going to show you how to restore your Siberian from these backups. You need your database name and credentials.
IMPORTANT:
NEVER restore your Siberian if:
- your database is broken and you made a backup on it. So obviously, the database backup is broken too.
- your database and files do not correspond to the version of your new Siberian installation (For instance, you can’t restore Siberian 3.5 files and database in a 3.13 version. Obviously, you can’t restore Siberian 3.13 files and database in a 3.5 version either).
Note: We advise you to inform your customers before restoring your Siberian. As you will restore to a previous version, they will loose the work they have made since your last backup. Moreover, it will prevent them to create content when your are restoring.
What will a restoration allow me to do?
The restoration of Siberian, to a previous healthy version, will allow you to get back to a working system if you made a mistake and broke the database of Siberian, or accidentaly deleted files,… . For instance, if you upload an SAE update in your PE/MAE and install it, that will totally break your database and you won’t be able to perform any more updates or install other modules.
Moreover, if we encounter an issue with a new feature, it will allow you to restore to the previous version of Siberian and perform the update later, when the issue will be fixed by the Dev team.
How to restore from Plesk:
Suppression of the Siberian database
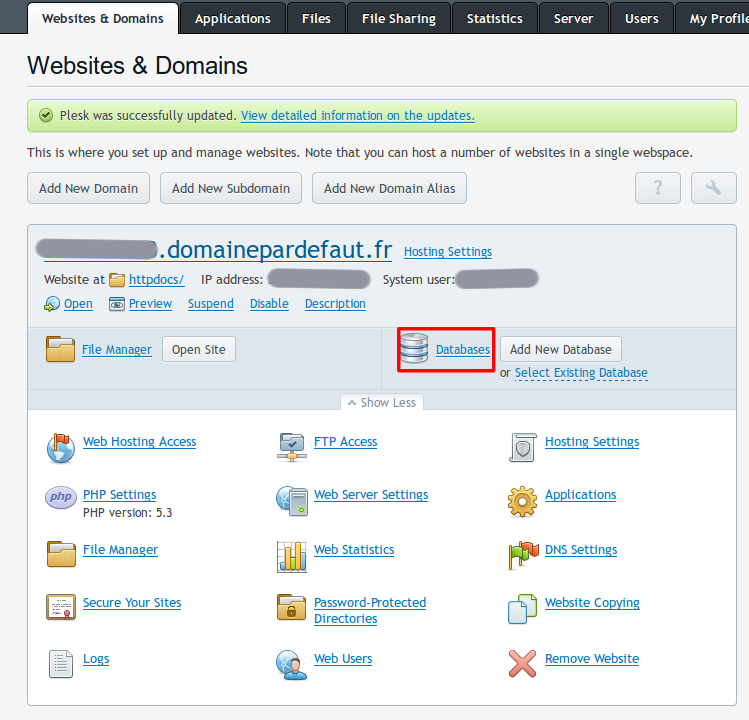
- Connect to your Plesk panel then find your domain name in the list of Websites & Domains.
- Click on the “Databases” button of your domain name:
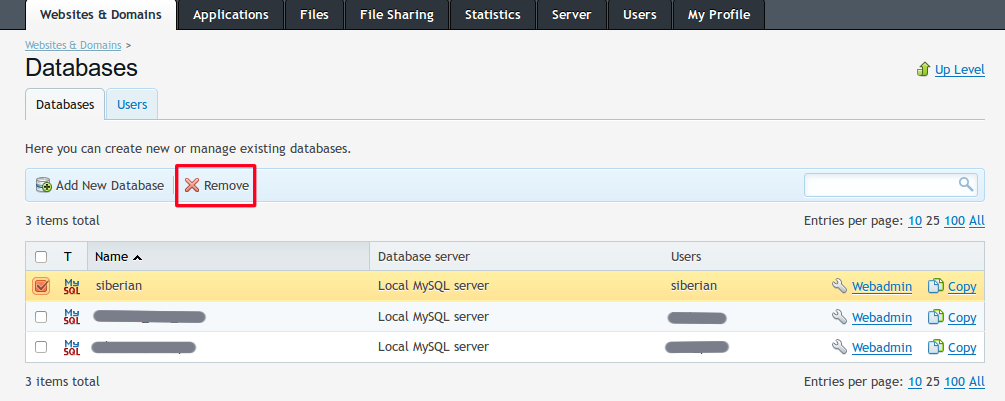
- Select the Siberian database then click on the “Remove” button:
Suppression of the Siberian files
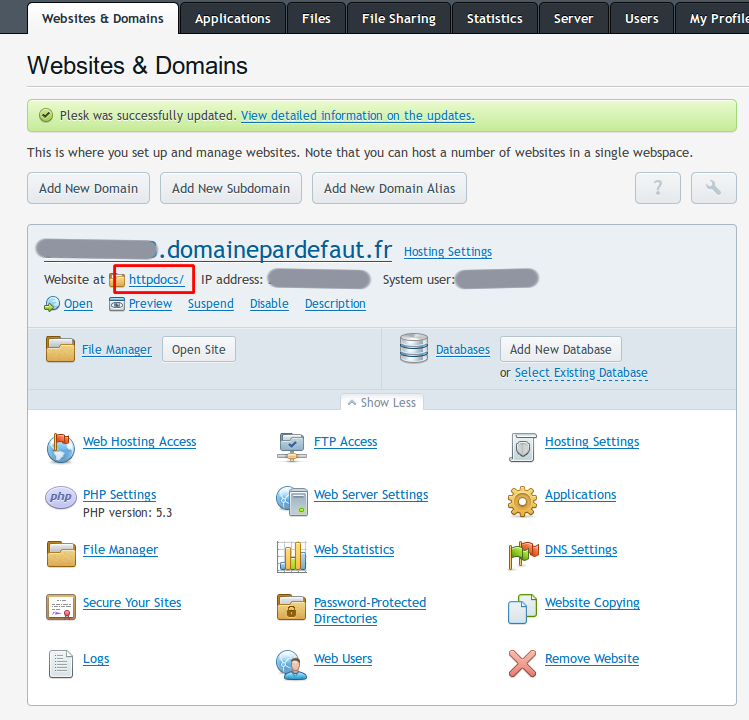
- Go back to Websites & Domains and open the Siberian install folder by clicking on the folder icon just below your domain name (In the example, the name is httpdocs/ but it can be anything. It depends on your Siberian installation):
- Here you find all the Siberian folders and files. Tick the box on the left side of the Name column, it will tick all the boxes below. Then click on the “Remove” button. This will remove all the Siberian files.
Now, your Siberian does not exist anymore. We are going to restore it.
Restoration of the Siberian files:
- Click on the “Upload Files” button then select your backup file. Plesk will upload it to your Siberian install folder.
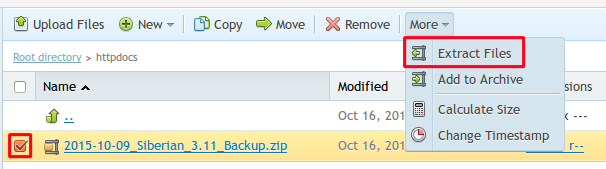
- Once the backup file is uploaded, tick the box on the left of the file then click on the “More” button then “Extract files”:
- Leave the default options and click on the “OK” button.
- All the Siberian files are going to be restored. Once done, you can remove the backup file you uploaded earlier.
Note: please read this article to know how to change the app.ini file settings if needed.
Restoration of the Siberian database:
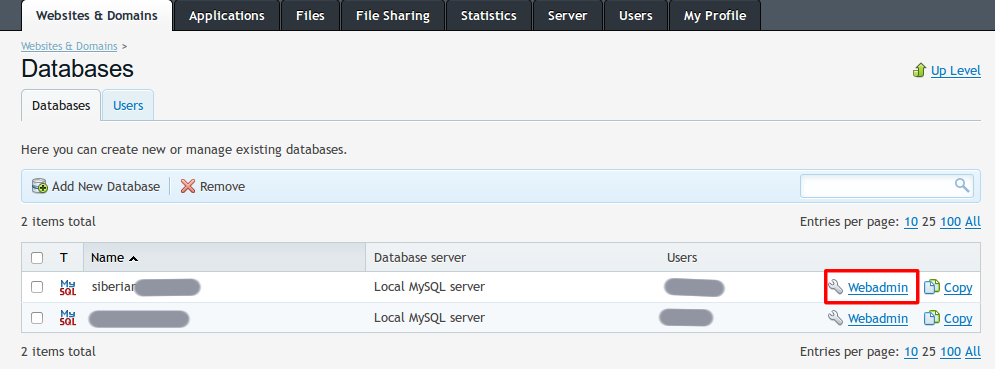
- Go back to Websites & Domains and click on the “Databases” button of your domain name.
- Click on the “Add New Database” button and create a new database using the same name and credentials as the old one.
- Then, click on the “Webadmin” button of your new database:
- It opened phpMyAdmin, a tool to manage and edit your Siberian database easily. Click on the “Import” button:
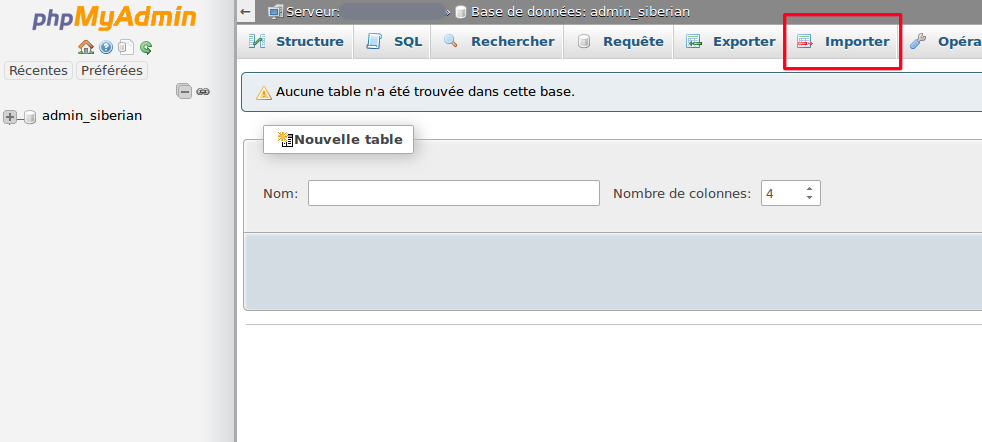
- Click on the “Browse” button then select your database backup file. That will import your database backup file and restore the database (If you get an error message about the size of the database backup file, please read the “I can’t import my database backup” paragraph at the end on the page).
Voilà! Your Siberian is restored. You can now keep going your business properly.
How to restore from cPanel:
Suppression of the Siberian database
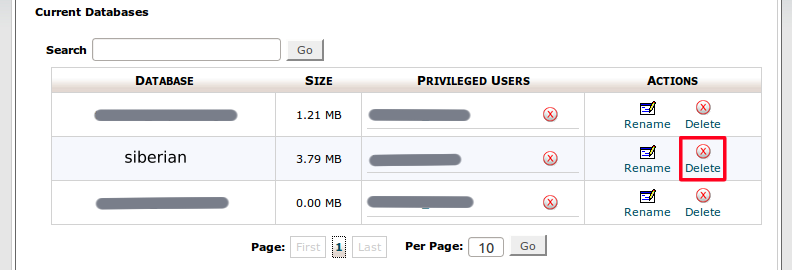
- Connect to your cPanel panel then click on “MySQL Databases” which is in the Databases part.
- In the list of the databases of your server, click on the “Delete” button for your Siberian database:
Suppression of the Siberian files
- Go back to your main cPanel page and click on “File Manager” which is in the Files part.
- Select the “Document Root for: ” option and select your Siberian domain name in the list.
- Click on the “Select All” button then on “Delete”. This will delete all the Siberian files.
Now, your Siberian does not exist anymore. We are going to restore it.
Restoration of the Siberian files:
- Click on the “Upload” button, on the left of the “Delete” button, then select your backup file (Leave the default options). cPanel will upload it to your Siberian install folder.
- At the bottom right corner of the page a status bar appeared. Wait until the message says the upload is completed then go back to your Siberian install folder.
- Select your backup file then click on the “Extract” button. Once the extraction is done, you can delete the backup file.
Restoration of the Siberian database:
- Go back to your main cPanel page and click on “MySQL Database Wizard” which is in the Databases part.
- Create a new database using the same name and credentials as the old database.
- Go back to your main cPanel page and click on “phpMyAdmin” which is in the Databases part.
- It opened phpMyAdmin, a tool to manage and edit your Siberian database easily. In the left panel, select your database then click on the “Import” button:
- Click on the “Browse” button then select your database backup file. That will import your database backup file and restore the database (If you get an error message about the size of the database backup file, please read the “I can’t import my database backup” paragraph at the end on the page).
Voilà! Your Siberian is restored. You can now keep going your business properly.
I can’t import my database backup
This issue comes from your PHP configuration: it does not allow you to import files bigger than what it is configured in the main php.ini file (usually it is about 2MB). The setting which blocks that is “upload_max_filesize”. In order to import your database backup, you will have to change this setting.
- Connect to your server with your SSH root access (it must be the root access, you won’t be able to change the setting with a user access. If you don’t have it, ask your hosting provider. If your server meets the Siberian requirements there is no reason you could not get this access).
- Then type the following command to locate the main php.ini configuration file on your server:
php -i | grep php.ini

The path of the php.ini file is indicated after the “Loaded Configuration File =>” sentence. We are naming it FILE_PATH for the next commands.
- Copy the path of the file (in this example it is /etc/php.ini but it can be anything, depending on your configuration.) then open it by typing the following command (replace FILE_PATH by your own php.ini file path. In this example it is nano /etc/php.ini for instance):
nano FILE_PATH
Note: If your server doesn’t know the nano command, you have to install it:
- For Debian/ubuntu operating systems:
apt-get install nano - For CentOS/Fedora operating systems:
yum install nano
- Now we need to search for the upload_max_filesize setting: press the “CTRL” and “w” keyboard keys at the same time. It opened a search bar at the bottom of the window.
- Type
upload_max_filesizethen press the Enter/Return keyboard key.
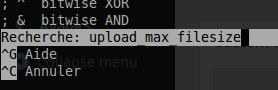
- It directly brings you to the setting:

- Change the value you have (here it is 2M for instance) by something which will feet to your database backup file size. For instance, if your database backup file is 3,59M big, set 4M to the upload_max_filesize setting.
- Once the modification is done, press the “CTRL” and “o” keyboard keys at the same time. This will ask you the name of the file you want to save: just press the Enter/Return keyboard key to save with the same file name.
- Now the file is saved, just press the “CTRL” and “x” keyboard keys to exit.
- Finally, you have to restart your webserver (we presume here that your server meets the Siberian requirements and uses the Apache webserver):
service apache2 restartorservice httpd restart - If everything went well, no error messages appeared. ;-) You can now close the SSH connection by typing
exit - Now you should be able to import your database backup in phpMyadmin and follow the remaining instructions.
Did You Find This Article Helpful?
No - 0 visitors found this post was not helpful

0 Comments