First of all, your clients need to have a domain name. If they do not have one yet, they can purchase one, for example at ovh.com. A .com name costs some € 5 / year. They are not required to purchase hosting service with their domain name.
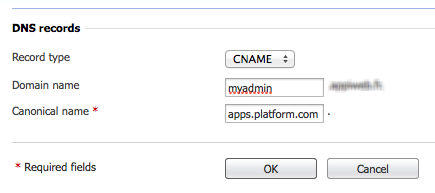
Then, they must have access to the DNS zones from the domain name management interface. DNS means Domain Name System. Don’t worry, this is not too technical. They will usually find the DNS zones in the Domain section of their domain admin panel. When they find that section, they have to create a type CNAME or CNAME record. In this record they will have to enter the following info:
domain name: their subdomain
address: the address or your editor (for example, apps.yourdomain.com, if your platform is installed on a subdomain, or yourdomain.com if your platform is installed on a main domain)
Here is an example of how it could look like (it depends on the domain admin panel):
Your clients can either choose to use their domain name exclusively as a white-label interface, or choose a subdomain (this is an example of the format: subdomain.mydomain.com). They have to enter the name of their domain or subdomain. If they have the option, they should set the TTL to the minimum value. If they don’t have this option,they should not worry. It just helps their modifications to be taken into account more quickly.
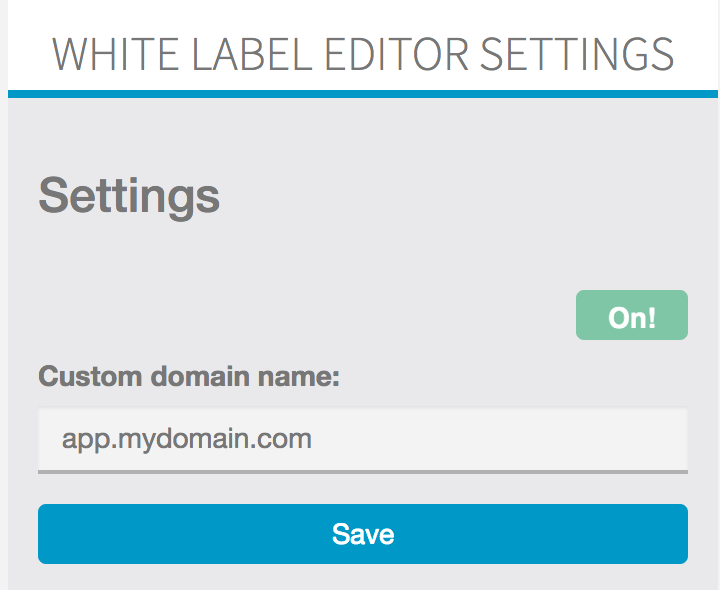
To finish, they must connect to their account on your platform. Then they have to enter their domain name. If they are using the domain for their white label admin panel, they must enter their domain name; if they are using a subdomain, they have to enter that name. If the CNAME has not been configured correctly, they will receive an error message.
Then they must not forget to customize their admin panel by clicking on this icon on the right of the general menu at the top:

Please note also that the customizations you make with this process will only appear at their white label editor address, and not on your platform, that’s why you may notice that the changes disappear when you close the customization panel. These changes are saved to be displayed at the address of their white label editor.
If they were able to set the TTL to the minimum value, they should be able to access their white-label interface immediately by typing the name of their domain or subdomain into their web browser. If not, they should be able to access it within 24h.
Then, once they have built the application of their first client, they should create and access to the application for him and give him the link to their white label panel. Thanks to this his client will be able to manage his app on your client’s admin without knowing he is using your platform.
Server settings
If, when creating a CNAME, you are redirected to another page than your Siberian, that means you have to change some settings in your server configuration. This happens because your platform is not the default website of your server or of your webspace.
For Plesk panel users:
If you see the default page of Parallel Plesk when entering the CNAME in your browser, do the following:
- connect to your plesk panel
- click on the “Server” tab
- in Tools & Resources click on IP Adresses
- click the IP of your server (the IPV4 one, not the IPV6 if you have IPV6)
- for “Default site” choose your platform, and save
- enter the CNAME in your browser and that should be ok.
For cPanel panel users (note that the process below will require you have a dedicated server or a VPS, with root access):
If you see the “Sorry” page of cPanel when entering the CNAME in your browser, do the following:
- connect in SSH to your server
- find the httpd.conf file of apache (if you have cPanel installed, most of the time this file is in /usr/local/apache/conf/)
- edit this file
- Go down and find the entry related to your platform. It begins with <VirtualHost xx.xx.xx.xx:80> and the ServerName is the address of your platform. Copy all this entry beginning by <VirtualHost xx.xx.xx.xx:80> and ending by </VirtualHost>, paste it in a text editor.
- connect to your WHM panel
- in the left menu, click on “Service configuration” then “Apache configuration” then on “Include Editor”
- In the “Pre VirtualHost Include” part, select “All versions”
- Past the entry you just pasted in your text editor then click on the “Update” button.
- To finish, click on the “Restart Apache” button and wait until the Apache server has restarted.
That’s it.
Note: If you can’t see it working in your web browser, that means you have cache in it. Flush your web browser’s cache or try with another web browser.
If you don’t have Plesk or cPanel panels (note that the process below will require you have a dedicated server or a VPS, with root access):
You have to change the vhost configuration file on your server. You have to do the following:
- connect in SSH to your server
- find the httpd.conf file of apache (if you have cPanel installed, most of the time this file is in /usr/local/apache/conf/)
- edit this file
- go down in the file to find the first entry which matches the webspace in which your platform is installed as well as other websites. For instance you can have your platform and other websites installed in /home/www/mywebspace/, with your platform installed in /home/www/mywebspace/platform (these are exemples)
- The first entry which matches your webspace should be another website (actually it should be the one on which you are landing when entering your CNAME in your browser). This entry begins by <VirtualHost xx.xx.xx.xx:80> where “xx.xx.xx.xx” is the IP of your server, and it ends with </VirtualHost>. Below <VirtualHost xx.xx.xx.xx:80> you will see the ServerName which match the address of your default website.
- Go down and now find the entry related to your platform. It also begins with <VirtualHost xx.xx.xx.xx:80> but the ServerName is the address of your platform. Copy all this entry beginning by <VirtualHost xx.xx.xx.xx:80> and ending by </VirtualHost>, paste it in a text editor.
- Go back to your SSH console, and comment all the lines related to this entry (the entry for your platform) by adding a # before each line (<VirtualHost xx.xx.xx.xx:80> and </VirtualHost> included).
- Go up in the file to the first entry of your webspace, the one we have seen on point 5, above <VirtualHost xx.xx.xx.xx:80> of this entry paste the entry of your platform (the one you have pasted in a text editor).
- Save and exit
- Restart apache by entering “service httpd restart” or “service apache restart”, depending of your server, and it’s done.
- If you don’t know how to do it, contact us in a bug ticket and send us your ssh root access.
Did You Find This Article Helpful?
No - 3 visitors found this post was not helpful

2 Comments
Ron Pumfleet
Clear as mud. More info would be very useful even creating a simple video would also be useful
ares971
Very good information !